Sorting Freestyle Sign-In Sheets
This Summer, the Allen Community Ice Rink is experimenting with a new package system for its Freestyle figure skating camp. One of the challenges inherent in this system is tracking the diverse schedules of our patrons — from session registrations to daily sign-ins, a large amount of coördination is required to ensure that patrons’ information is accurately reflected across our discrete data repositories. Furthermore, we must make this information easily accessible to prevent confusion during early morning Freestyle sessions; thus, in this article, you will learn how to optimally sort information on Summer Camp sign-in sheets, shortening the amount of time occupied by each patron.
Setting the stage: isolating packages
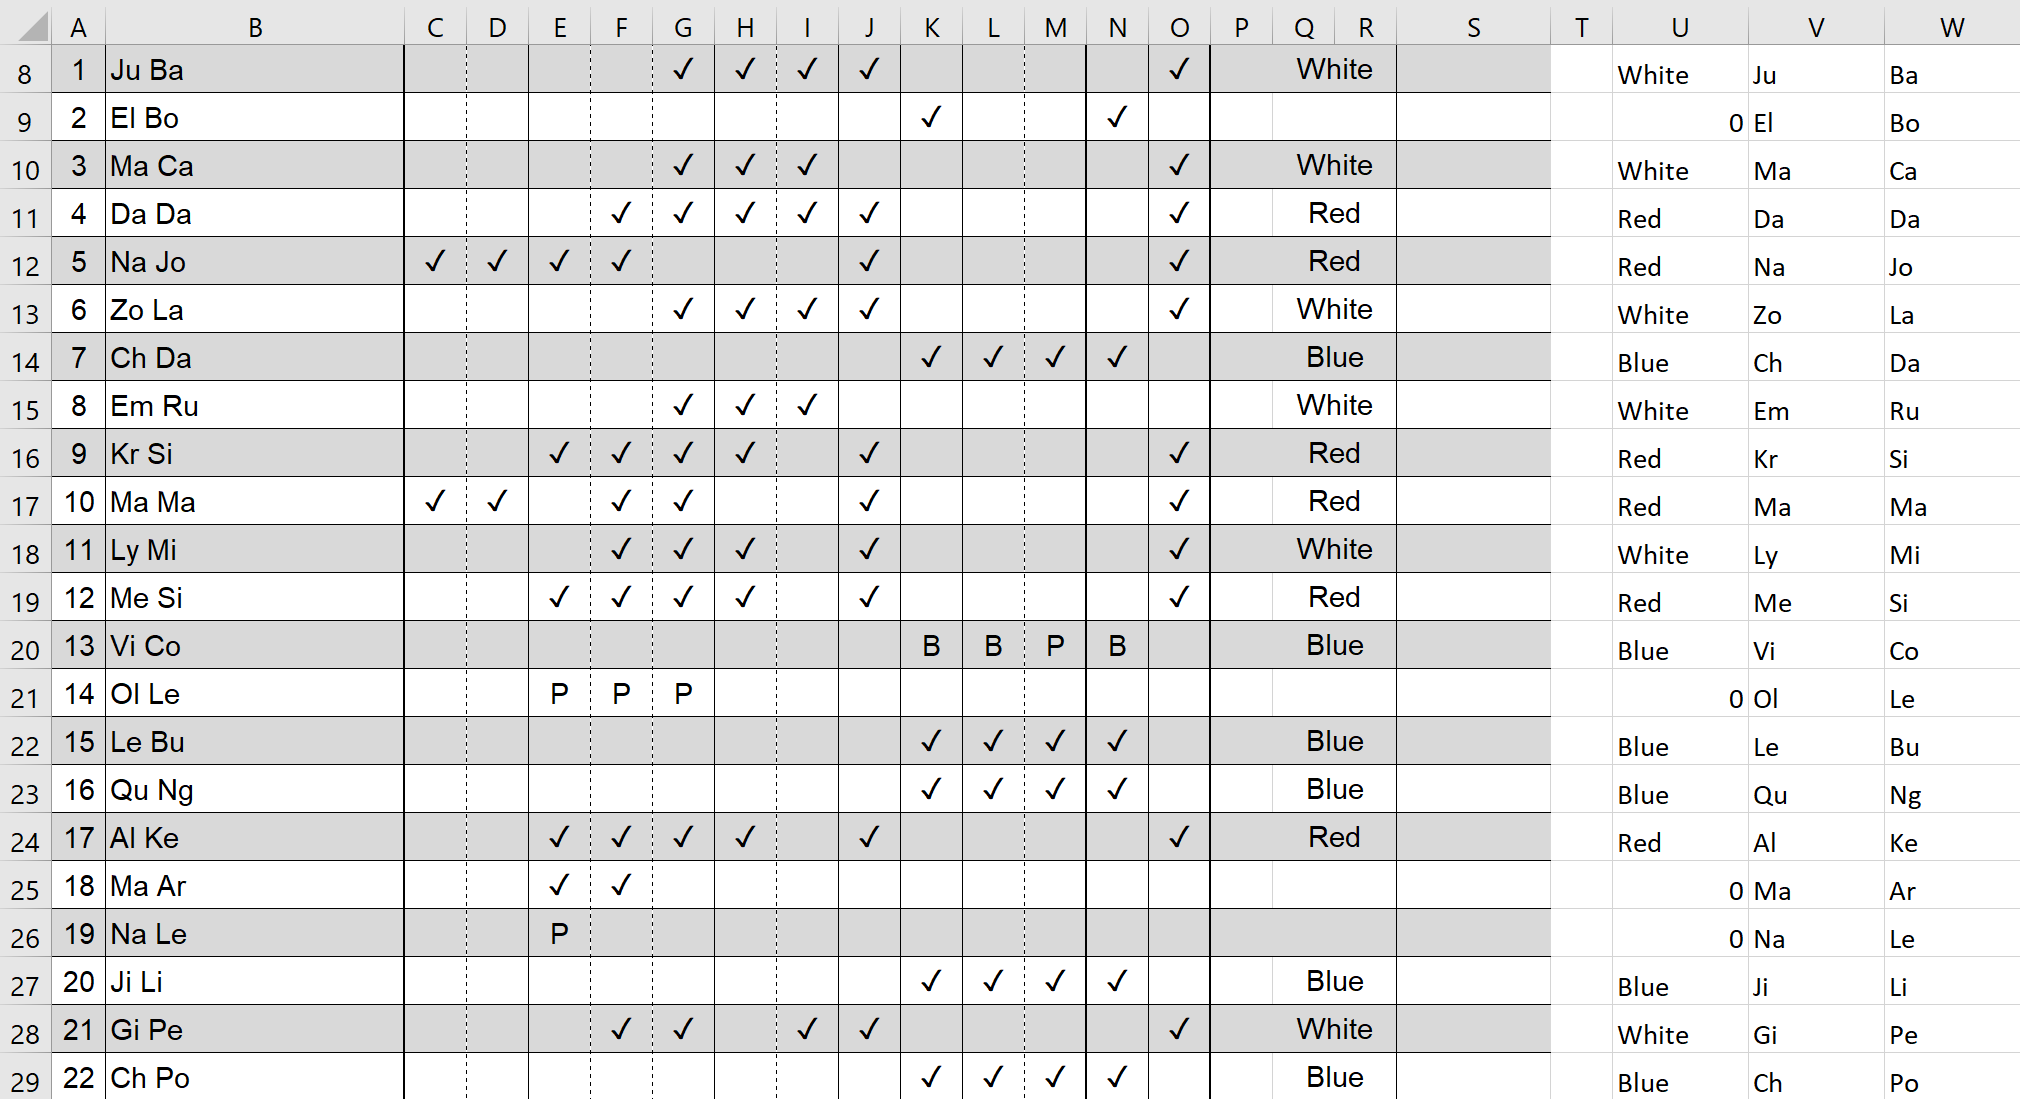
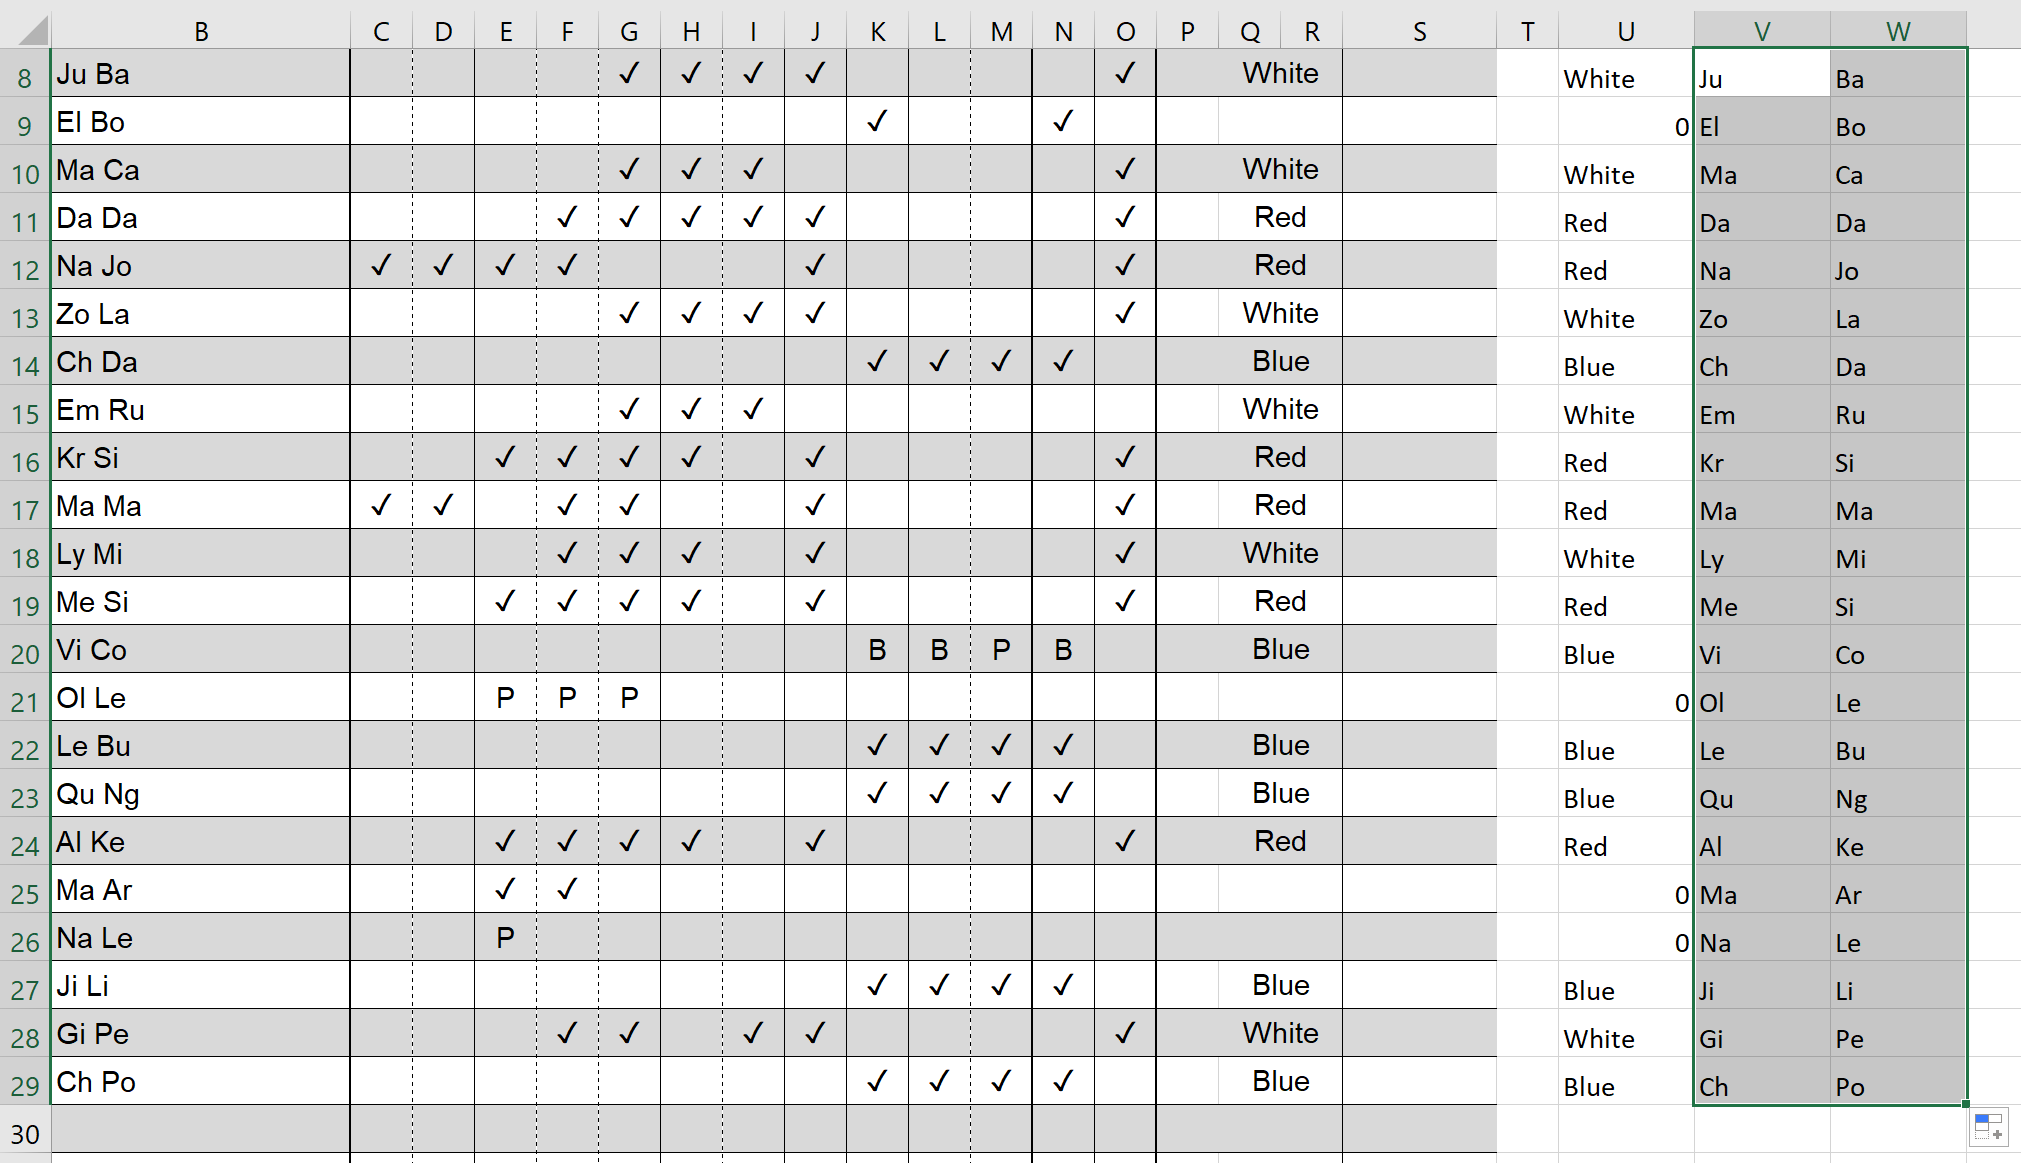
As of 31 May 2018, this is the Freestyle sign-in sheet for Monday, 18 June (for privacy, patron names have been truncated to their first two characters):
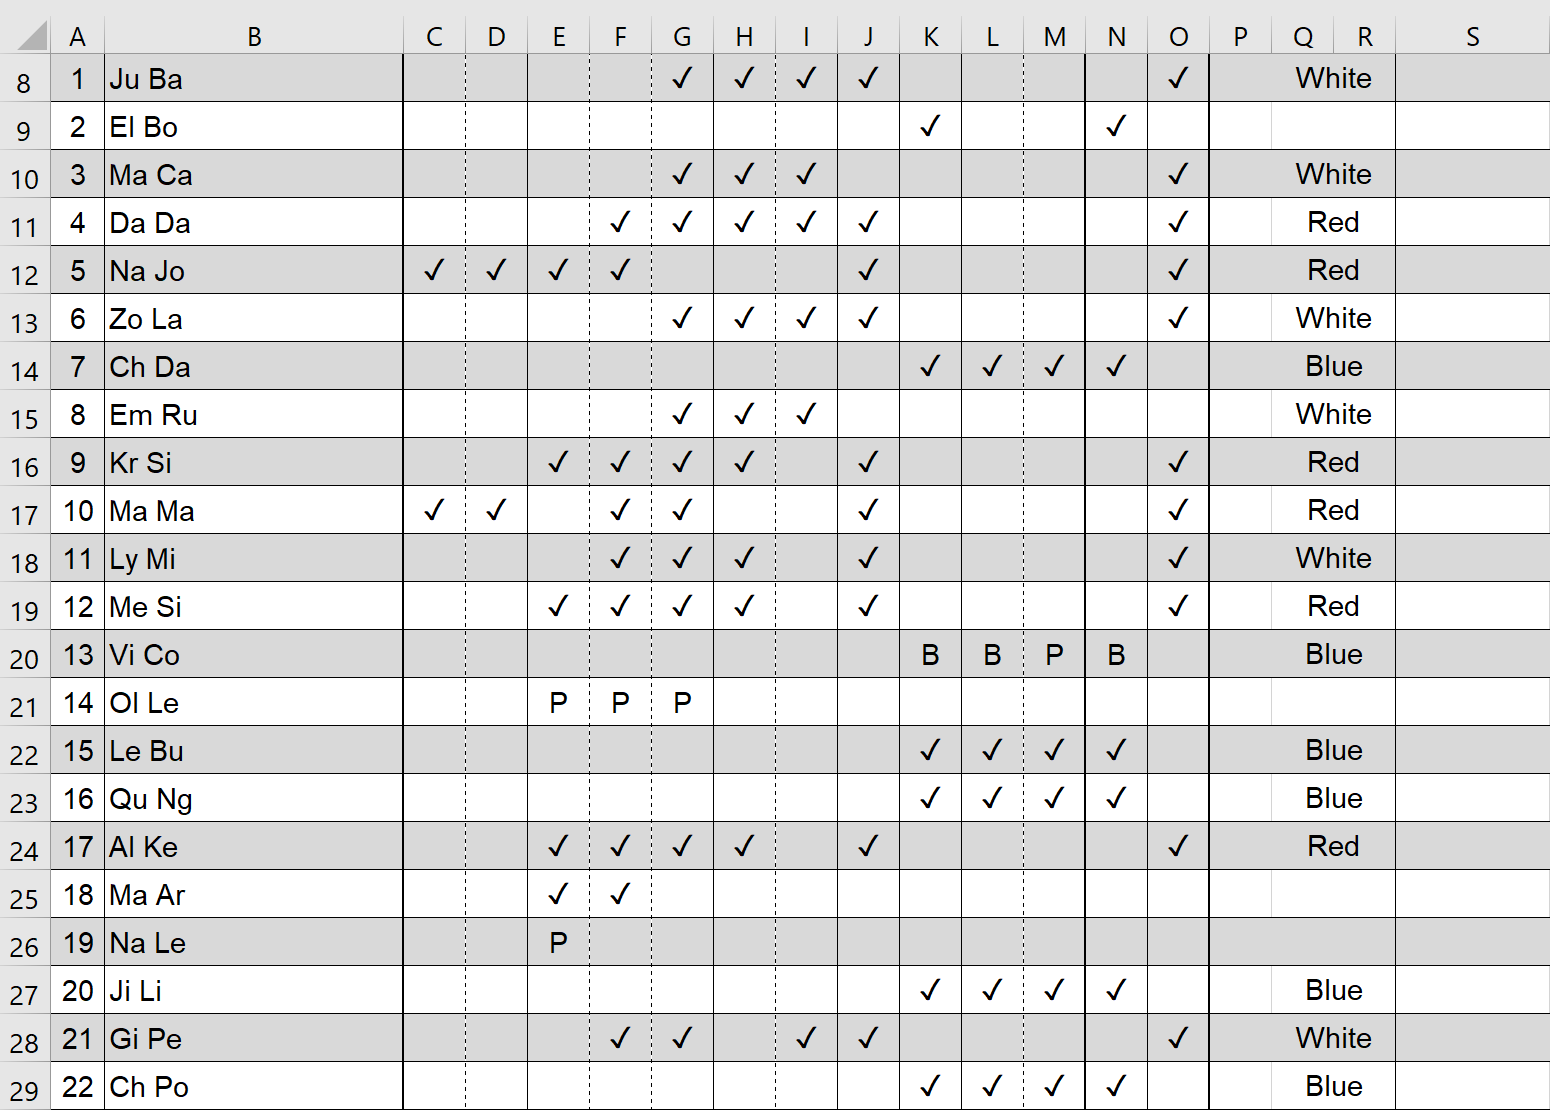
As you can see, there is no order to this sheet, be it by package, name, or otherwise; thus, the sheet will be very difficult to parse. To change this, we must sort its rows, first by package purchased, then alphabetically by last name, then by first name. First, we must construct an auxiliary table of sorts that contains only the data required for sorting. As the package a patron has purchased is our first sorting criterion, we shall isolate it first.
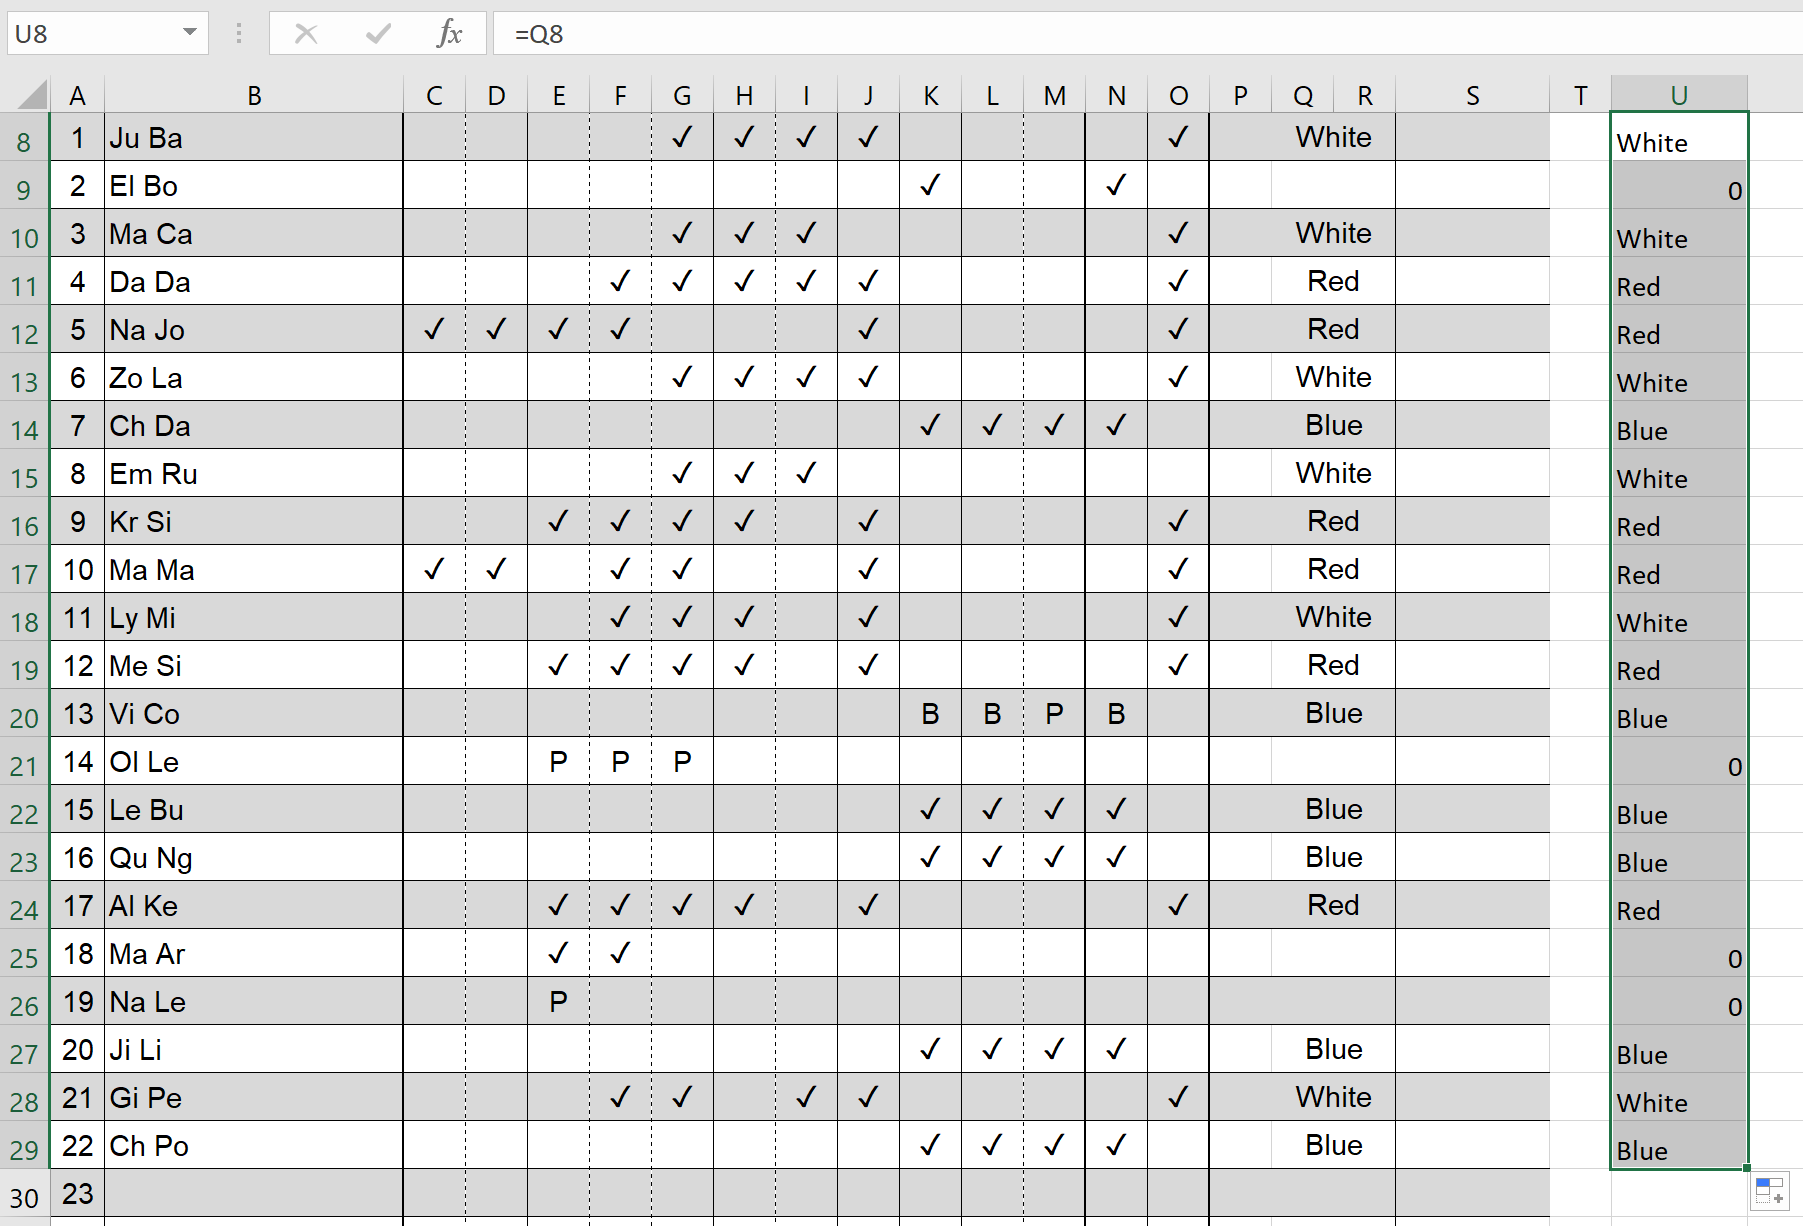
To create a column containing only package names, select a cell a few columns to the right of the main sign-in table, in the same row as the first patron. Type an = sign, then click the package name corresponding with the first patron and hit the Enter key. If the first patron has not purchased a package, click the cell in which the package would be displayed if they had. For this example spreadsheet, the final formula should read =Q8.
Now, click on the same cell we just edited. Place your cursor over the green square in the lower right-hand corner of the cell, then drag downward until you reach the last patron on the sign-in sheet. All of the selected cells will populate with the corresponding package names, and zeros where there is no package:
Isolating patron names
To sort by last name, then first name, we must isolate patrons’ first and last names into separate columns. There are two ways to perform this separation: one that is based primarily on a graphical interface, and another that relies on typing in formulas. Both methods are described in the following sections.
Using “Text to Columns”
Excel provides a graphical interface for splitting character-delimited data, the “Text to Columns” wizard, accessible from the Ribbon at . Select all cells containing patron names before clicking the “Text to Columns” button.
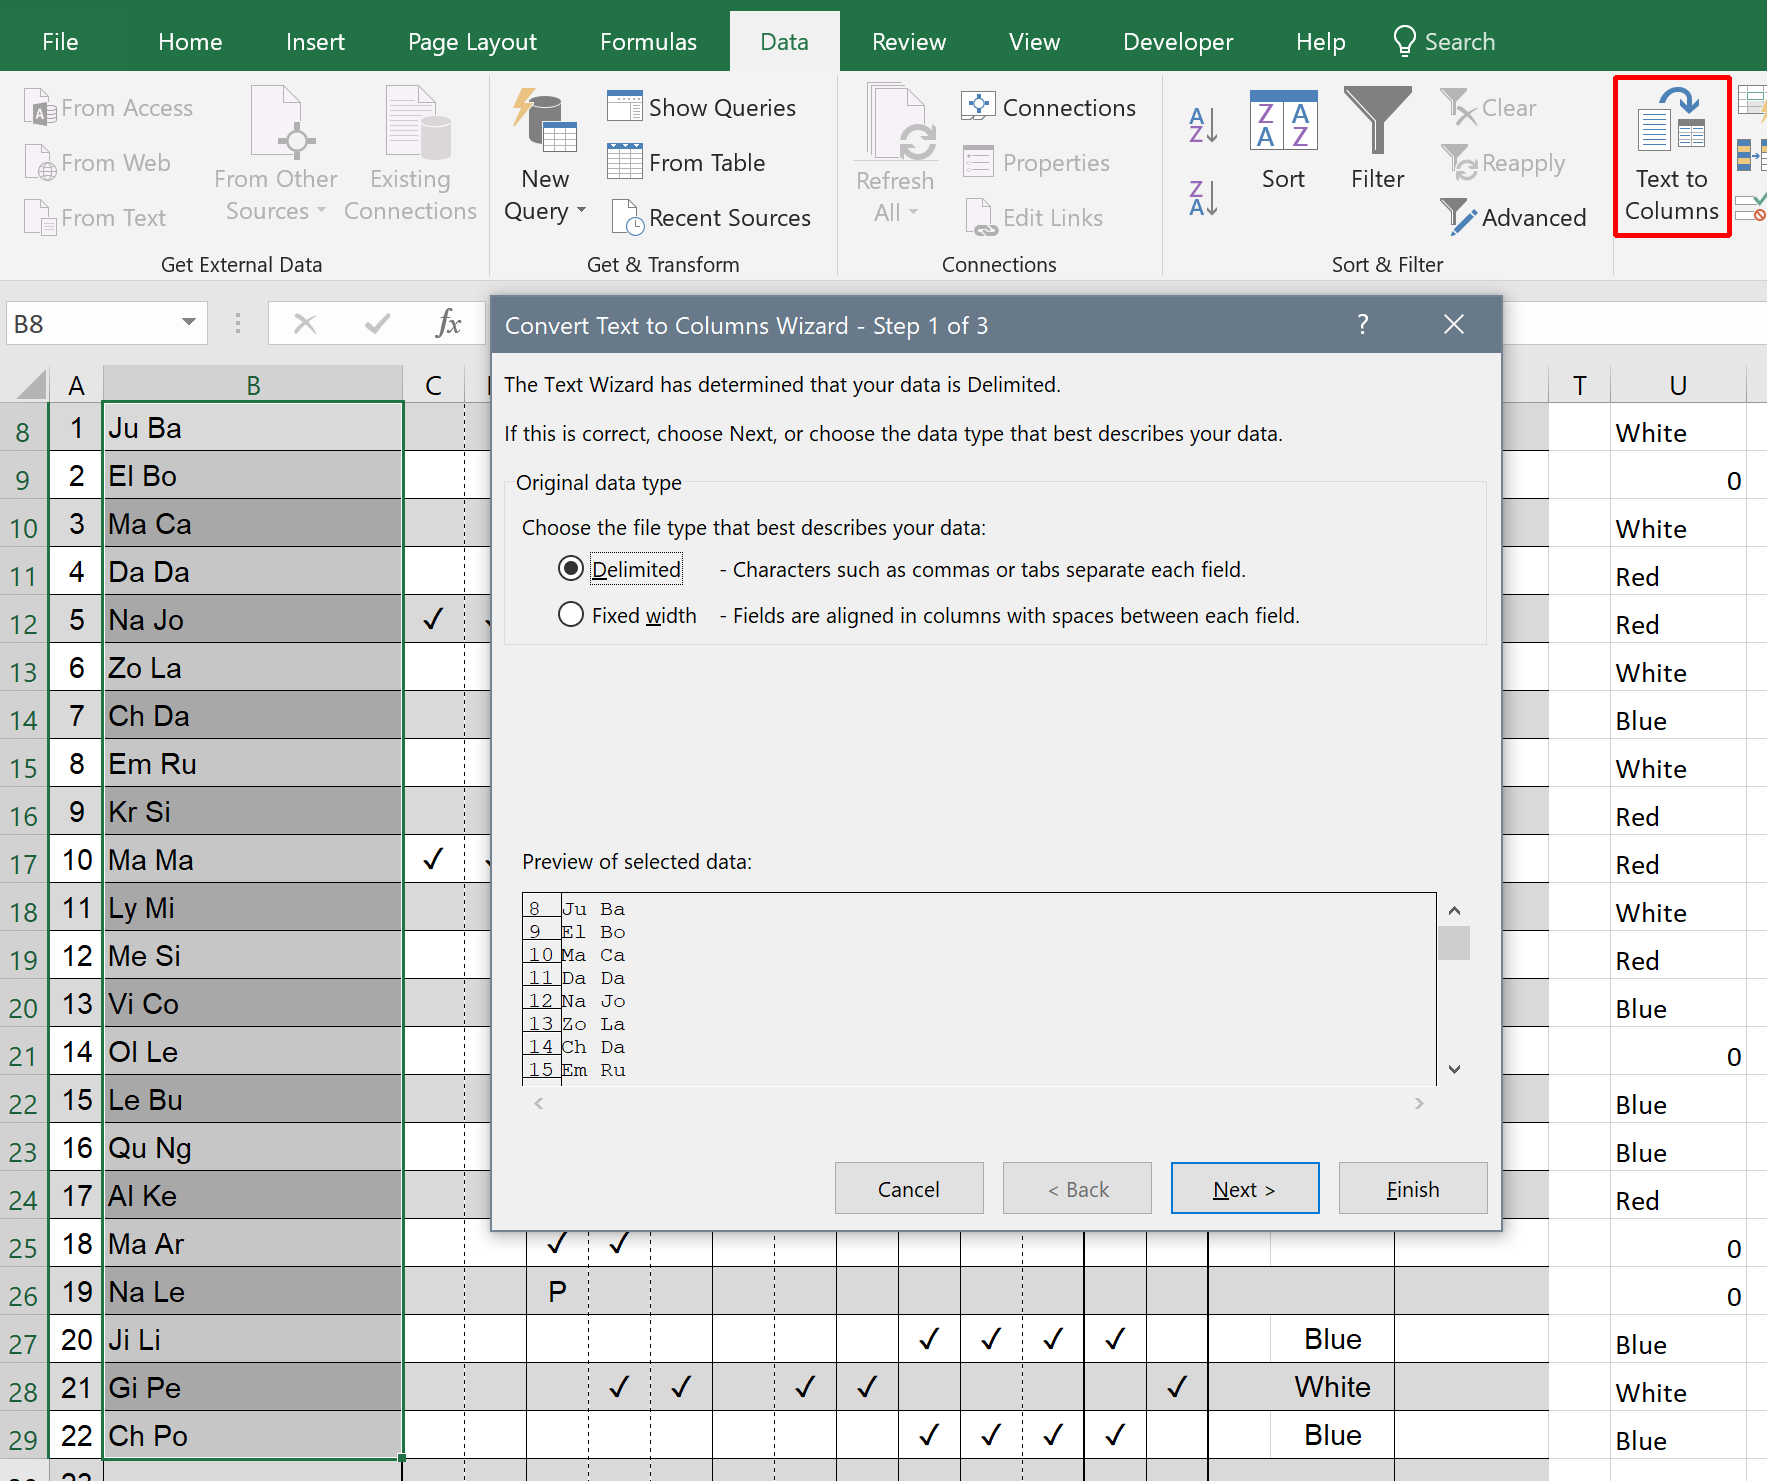
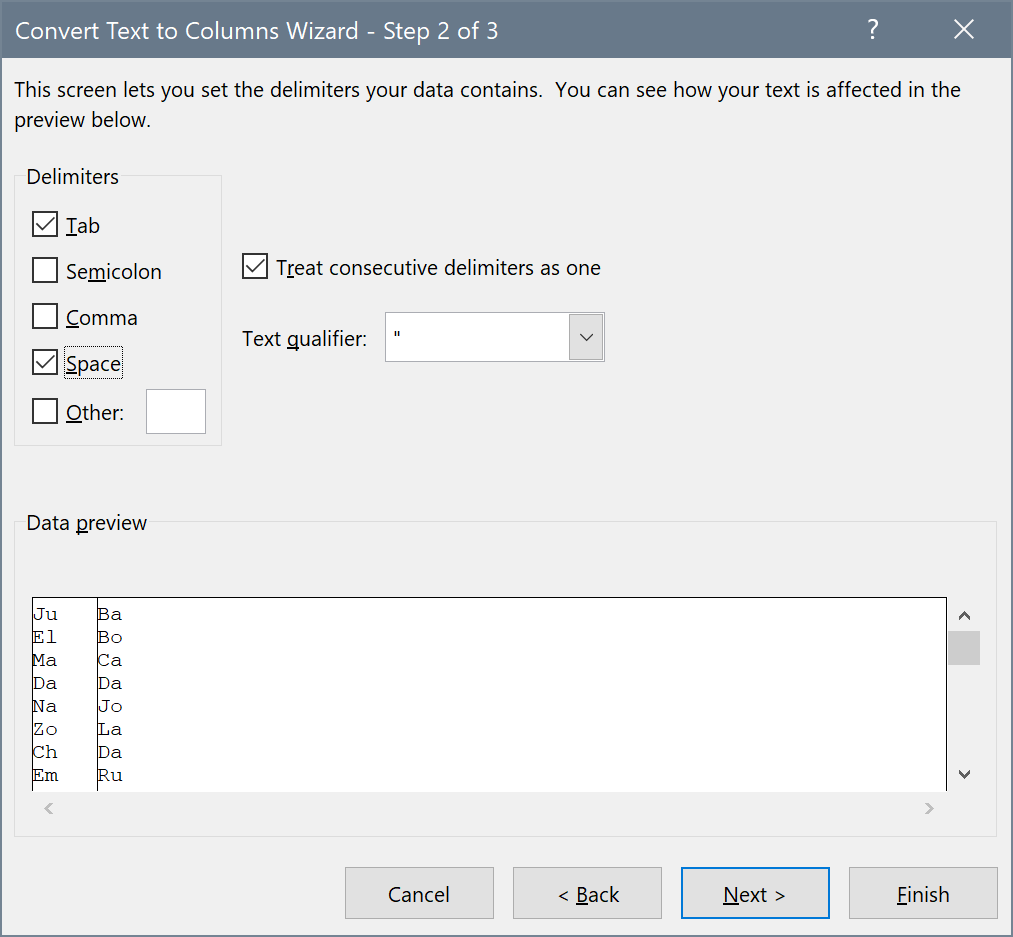
In the first screen of this wizard, the default option, “Delimited” data, will work for our names, so we can just click “Next”. In the next screen, we need to select the delimiter for our dataset; in this case, first and last names are separated by a space, so check “Space”. If a line appears between each first and last name in the data preview at the bottom of the dialog, we can safely click “Next”.
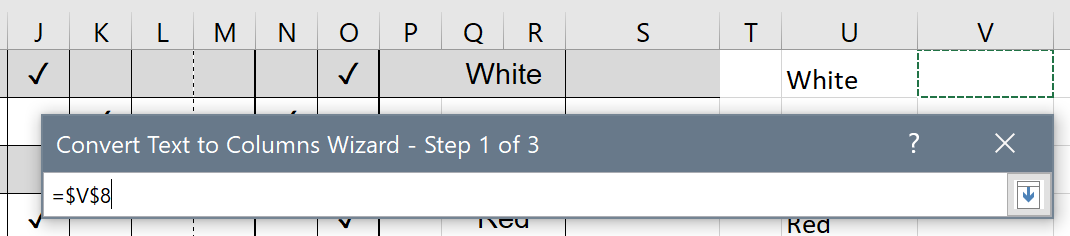
Finally, we must select the columns into which we would like our separated name data to be placed. In the final screen of the dialog, click the upward-facing arrow next to “Destination”, then click the cell directly to the right of the first package name and hit Enter. For our example spreadsheet, the “Destination” box should now read =$V$8.
Once you are satisfied with your selection, click “Finish” to close the Text to Columns wizard and populate your selected columns with separated first and last names. If you made a mistake at any point in this process, click “Undo” (Ctrl+Z) and try again. If you followed every step correctly, you should now have three columns as below:
Using formulas
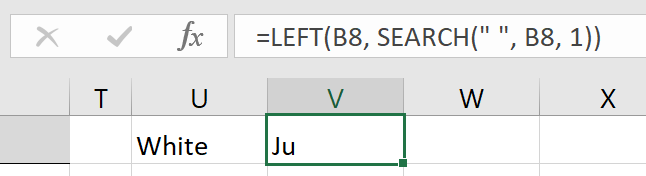
If you would rather not use the graphical wizard, you may also separate names with two formulas as described on Microsoft’s Excel support site. Click on the cell directly to the right of the first package name, then type =LEFT(. Click on the patron name in the same row, then type , SEARCH(" ",, click on the same name cell, and type ,1)). You should now have a formula that looks something like =LEFT(B8, SEARCH(" ", B8, 1)). Hit the Tab key, and the first name of the first patron should appear in the cell into which you just typed.
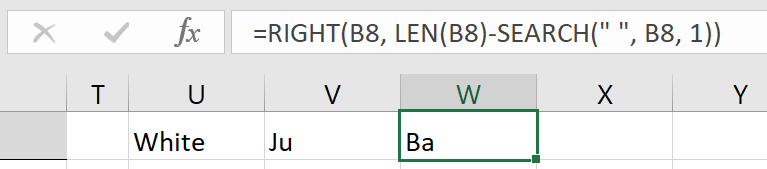
In the adjacent column, now type =RIGHT(, click on the patron name in the same row, type , LEN(, click on the same name, type )-SEARCH(" ",, click the same name, and type ,1)). You should now have a formula that looks something like =RIGHT(B8, LEN(B8)-SEARCH(" ", B8, 1)). Hit the Enter key, and the last name of the first patron should appear in the cell into which you just typed.
Now, select both the first and last name cell you both created, click the green square in the lower right-hand corner of the selection, and drag downward until you reach the row containing the last patron on the sign-in sheet. You should now have a fully-populated list of separated first and last names, as below:
Sorting the data
Now that we have isolated the data by which we would like to sort, we may perform the actual sorting. Click and drag from the first patron name to the last separated last name, then click in the Ribbon.
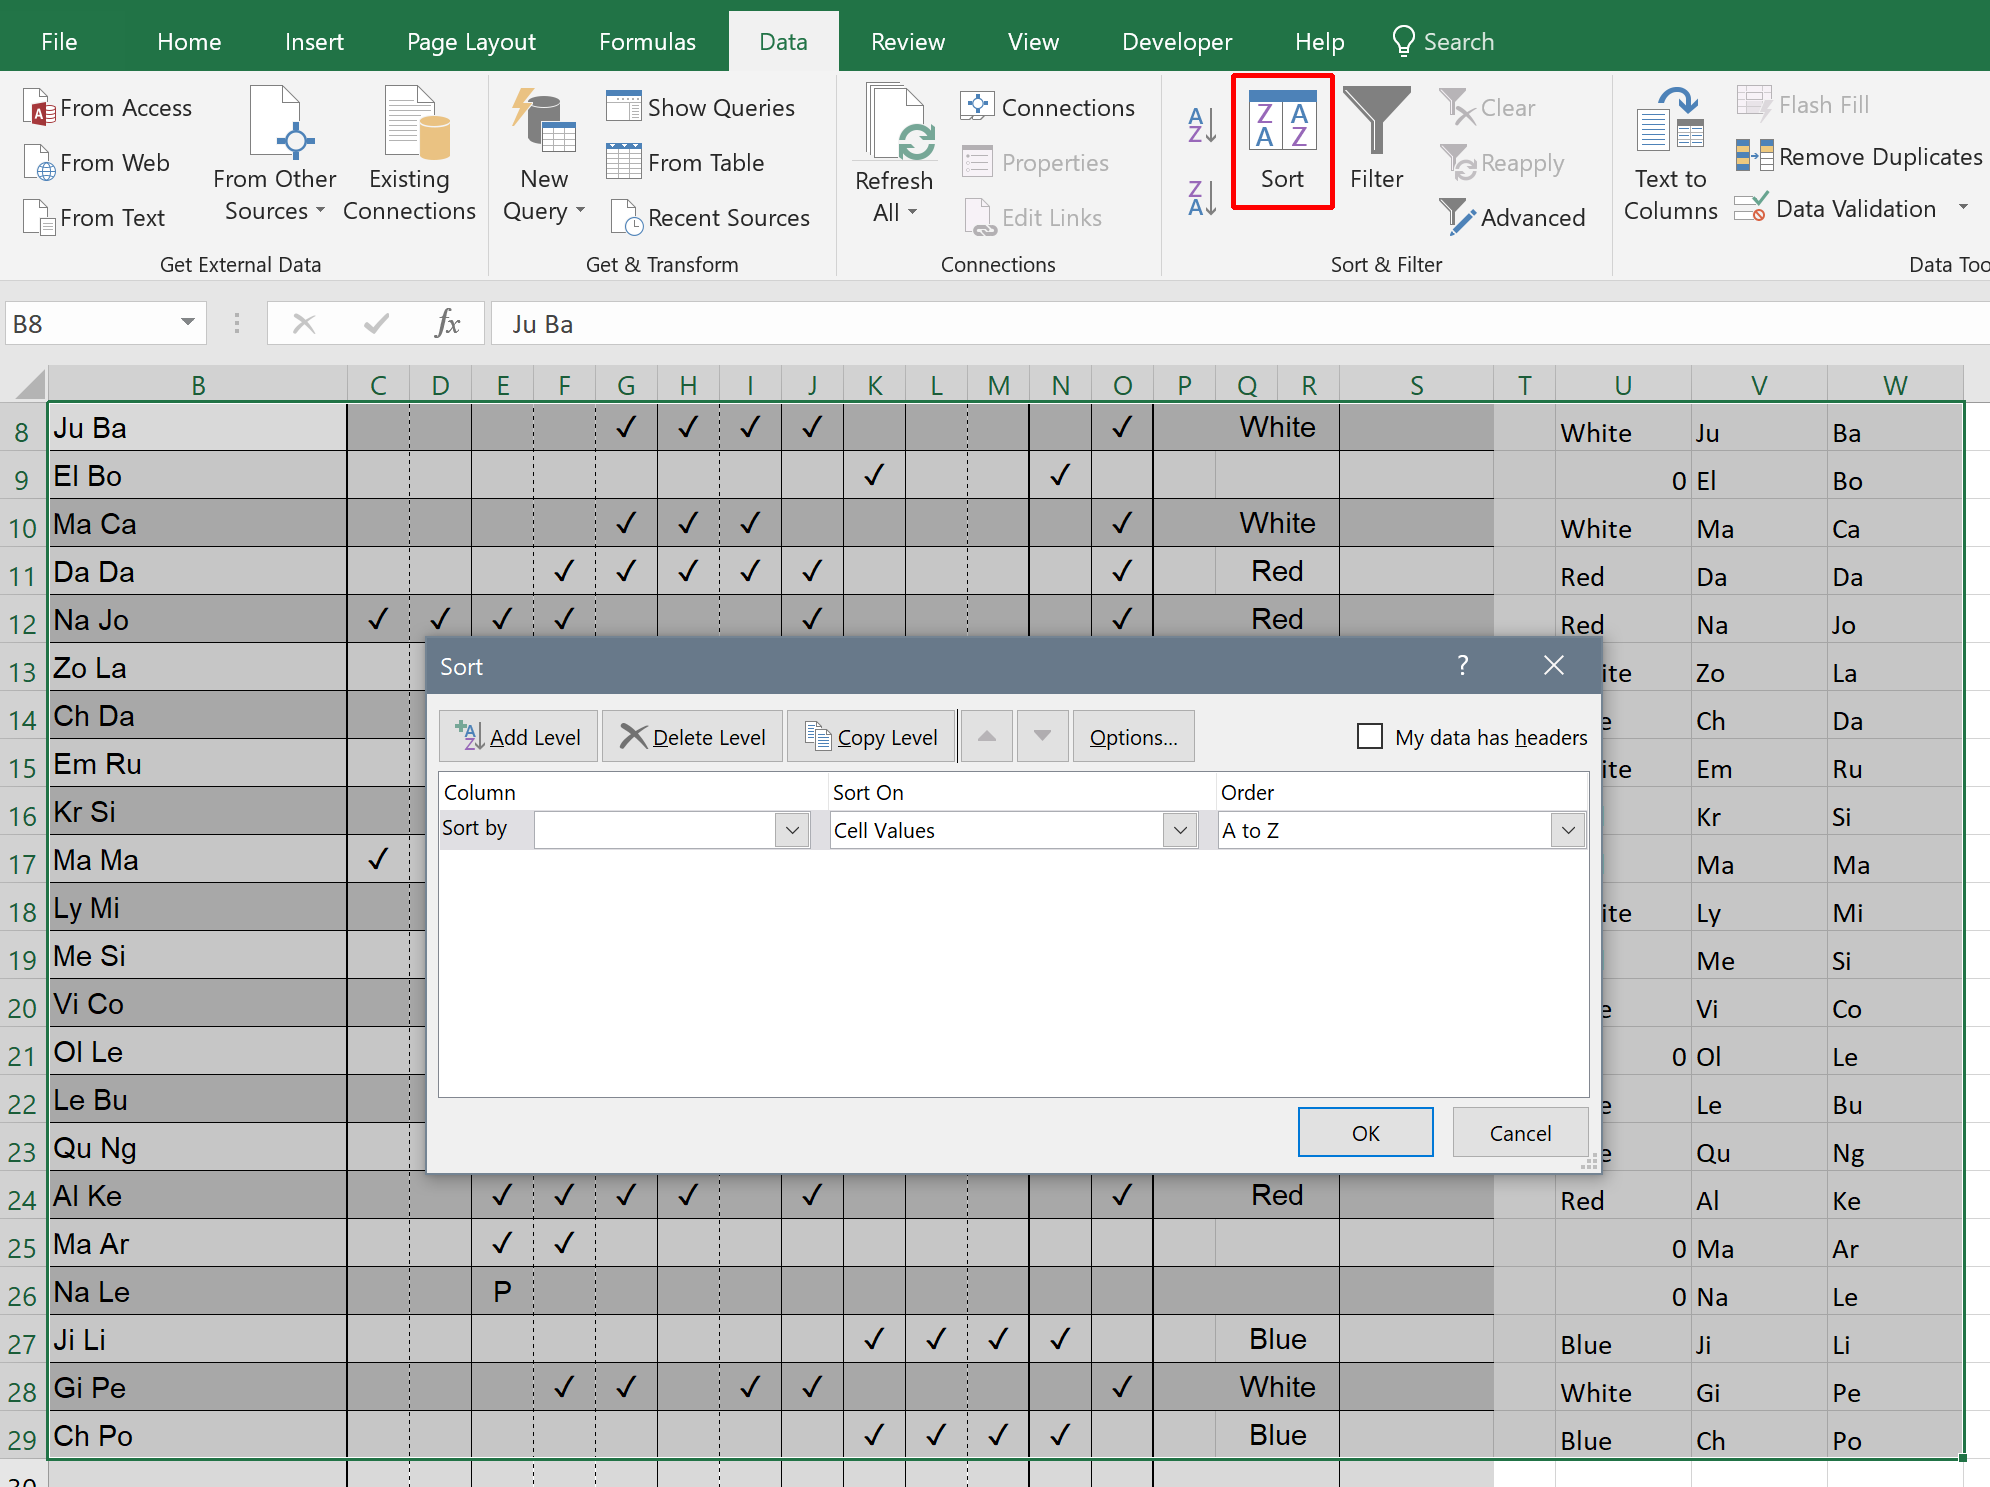
Sorting by package
The first criterion by which we want to sort our patrons is the package that each one has purchased. Click the drop-down menu next to “Sort by” and select the column into which you inserted the package names; for our example spreadsheet, this is Column U.
Next, we must tell Excel how we want to sort this column. By default, it will attempt to sort the column alphabetically, from “A to Z”; however, we want to place Red package-holders first, then White, then Blue. Click on the drop-down menu that says “A to Z” and select the “Custom List…” option. In the “List entries” text field, type Red, White, and Blue in that order on separate lines, then click “Add”.
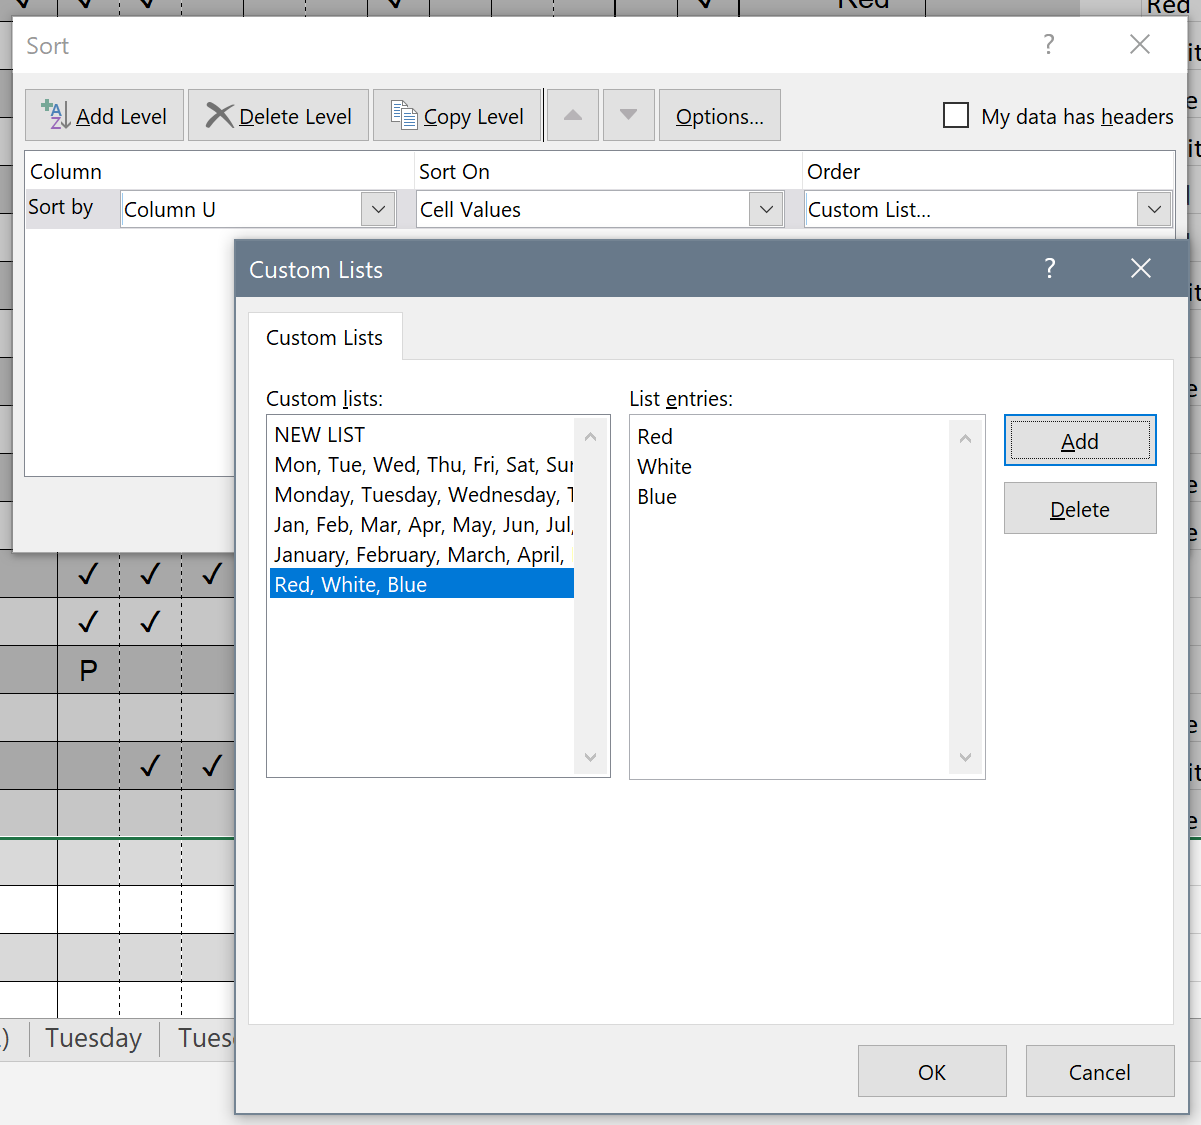
Ensure that your new sorting order is selected in the “Custom lists” menu to the left, and click “OK”. The “Order” menu in the main dialog should now read Red, White, Blue.
Sorting by name
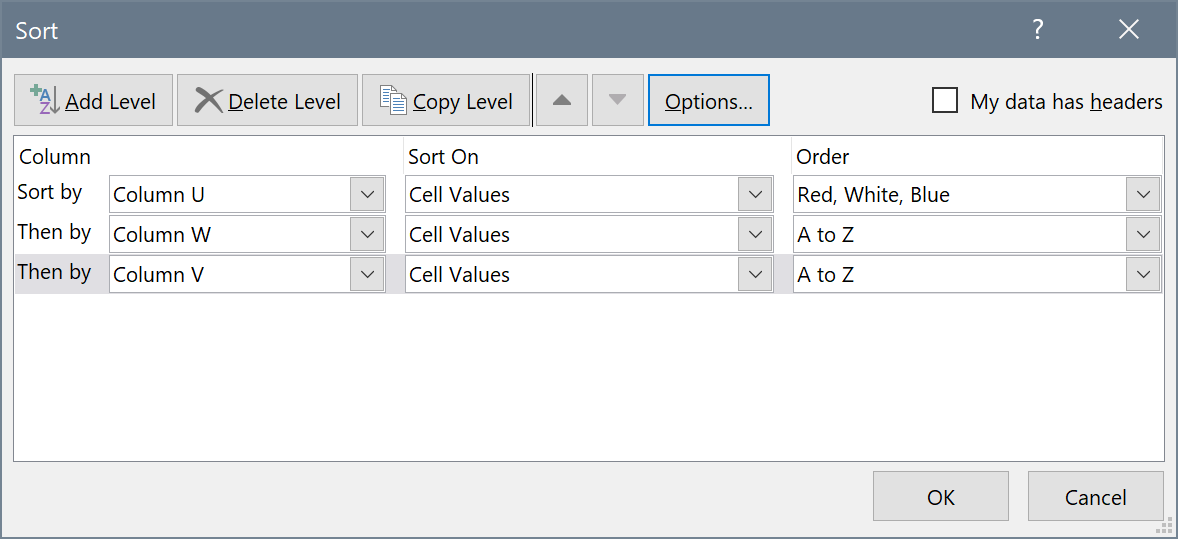
The next criterion by which we want to sort our patrons is each person’s last name. To add this secondary criterion, click “Add Level” in the Sort dialog. Select the column containing last names in the drop-down menu next to “Then by”; for our example spreadsheet, this is column W. The default collation order is desired, so we do not need to change anything else on this row.
To add a tertiary sorting criterion for patrons’ first names, click “Add Level” in the Sort dialog and select the column containing first names in the drop-down menu next to “Then by”; for the example spreadsheet, this is column V. The Sort dialog should now show three criteria.
Click “OK”, and the selected data should be sorted according to the criteria you defined.
Handling errors
If the sign-in sheet with which you are working contains merged cells, you will likely receive an error like this:
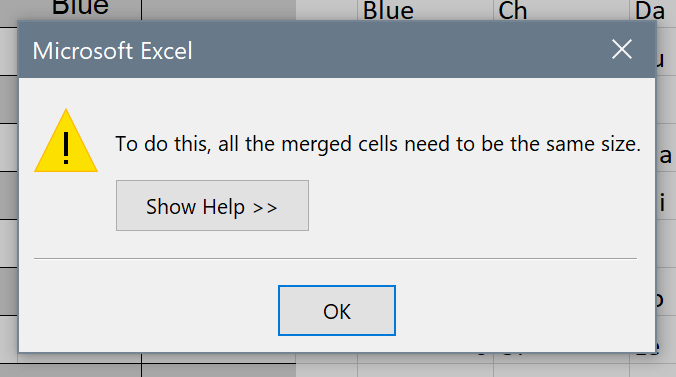
If you receive such an error, select all package names in the original sheet (not the auxiliary column you created), click in the Ribbon to unmerge the cells, and repeat the sorting process from the beginning. I take responsibility for this error; future sign-in sheets will not have any merged cells.
Finishing up
If you followed the entire process correctly, you should now have a correctly-sorted sign-in sheet.

Delete the three auxiliary columns to the right, save the document, and the sheet should be ready to be printed.
