Getting Started with the Crazyflie 2.0
If you are reading this, you’re most likely a student in the Information Engineering class at St. Mark’s School of Texas. Welcome! I’m Andrew Smith, Class of 2018; I took Info Engineering during my Senior year, the first year to use the Crazyflie nanoquads. During my tenure in the class, we struggled greatly to get the Crazyflie units off the ground, as the quality of the documentation from Bitcraze is lacklustre at best. However, through copious amounts of research and a fair deal of trial and error, I was able to get my quad into the air and flying complex paths, culminating in a final project to autonomously guide the unit along an arbitrary path with minimal visual semaphore information (code). In this series of posts, I hope to guide you from having a newly-built, lifeless Crazyflie unit to flying paths of your own design in as little time as possible. So, without further ado, let’s get started.
Prerequisites
In order to successfully follow this series, you’ll need the following:
- A Crazyflie 2.0 unit, with the Crazyradio PA long-range communications dongle
- The Crazyflie flow deck, an expansion board containing an optical flow sensor and laser rangefinder (optional, but encouraged)
- A game controller with a USB connexion
- A working installation of the Python 3 programming language, and a basic working knowledge of Python
- Administrative (
sudo) permissions on the computer you are using
If you have satisfied all of the above prerequisites, then you may continue onward and begin to set up your hardware.
Software setup
Before we can get your nanoquad into the air, we have to perform a few simple setup tasks. Some of these steps are operating system dependent (sorry, Windows users), so only follow the procedures that are required for your system; all OS names are writ in bold henceforth, so you should be able to easily locate the sections that pertain to your system. If at any point it seems like something isn’t working on your computer, first ensure that the procedure you’re following is necessary for your OS before sounding the alarm bell: this guide was tested recently, so no major errors are expected to occur.
Ou la Destinée: Installing libusb drivers
This step is only required if you are running a version of the Microsoft Windows operating system. In order to communicate with your quad via the Crazyradio dongle, you’ll need to install libusb drivers to bring Windows’ USB communication API to parity with the standard Unix feature set. First, plug your Crazyradio into an available USB port, then rotate the antenna so that it points upward. Download and run Zadig, a simple tool to install libusb drivers and associate them with a particular USB device. Upon opening the application, you’ll likely see an empty window like this:
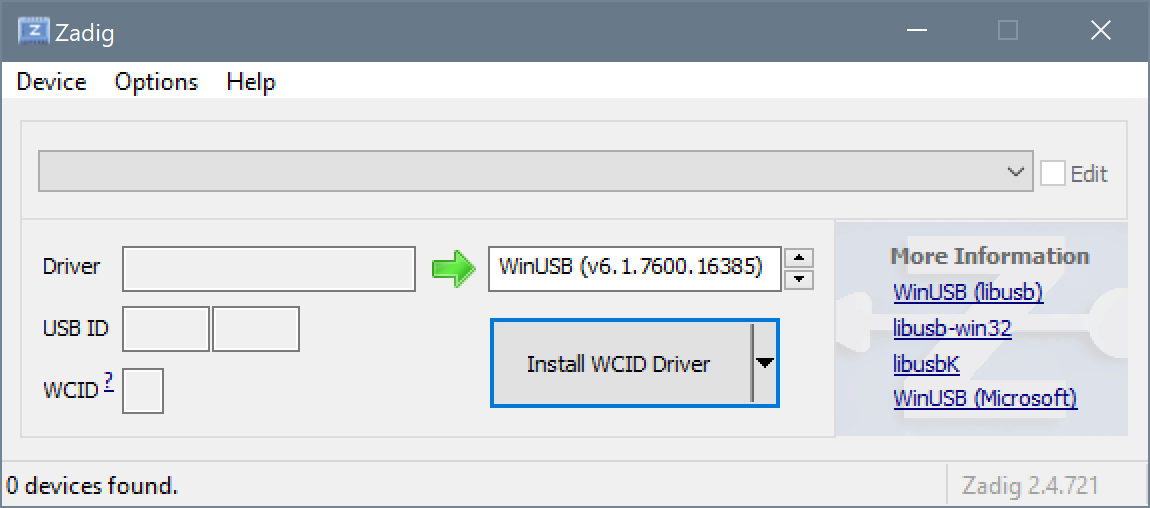
By default, Zadig may not recognise the Crazyradio dongle as a libusb-compatible device; to override this behaviour, ensure that the menu option is checked. In the main window, you may now select Crazyradio PA USB Dongle from the dropdown selection near the top, which is likely populated by default with a random USB device from your system. In the “Driver” box to the right of the green arrow, use the arrow buttons to switch through the available driver options until libusb-win32 is displayed. Before installing the driver, double-check that you have selected the correct options; your window should look somewhat like this:
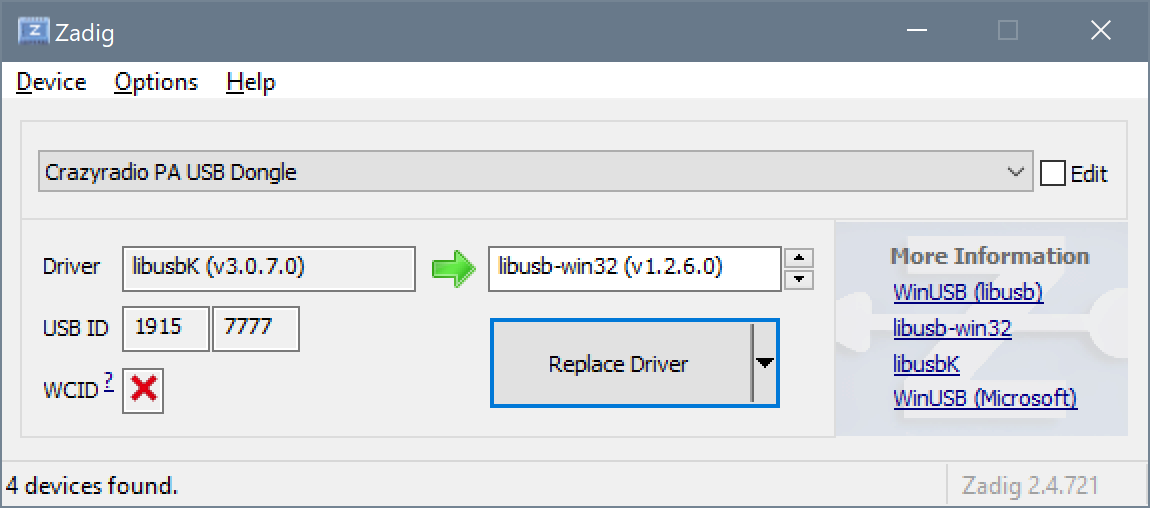
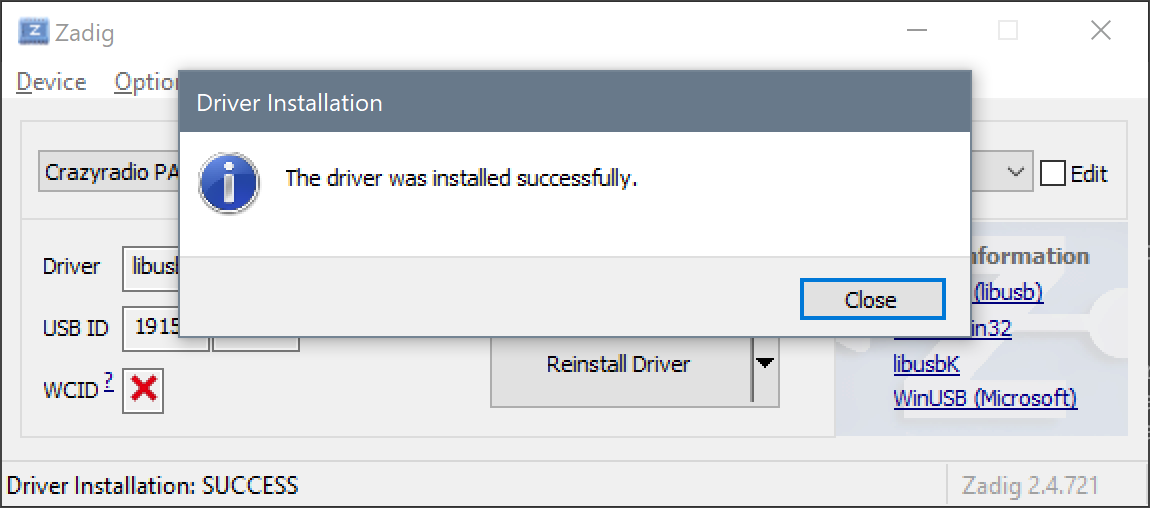
Note that the text displayed in certain areas of the screen may differ on your system; this disparity is expected, since I have already installed libusb drivers from my time in Info Engineering. If the components that you modified look correct, click the large “Install Driver” (or “Replace Driver”) button at the bottom of the window. After a brief processing delay, a dialog box should appear reporting that the driver installation was successful. If this is so, close Zadig and proceed to the next step.
The glass cockpit: Installing the Crazyflie client
In order to establish initial communication with your Crazyflie, we need to install the open-source client from Bitcraze. If you’re using Windows, you can download a one-click installer package from Bitcraze’s GitHub: consider this a reward for the libusb setup you just finished. Download and run the latest Windows release (the filename should look like cfclient-win32-install-*.exe), ignoring the SmartScreen protection warning and approving the User Account Control authentication request. Once the installation completes, you may continue to the next step.
If you are not running Windows, then you’ll need to install the Crazyflie client from source. If you are using a Mac running macOS, it is necessary for you to install the Homebrew package manager, which will allow you to easily install open-source software from source code archives. First, install Xcode in order to obtain a Mac-compatible build toolchain. Then, open a Terminal window and install the toolchain with the command xcode-select --install. Once that command completes, copy and paste the following into your Terminal to install Homebrew:
/usr/bin/ruby -e "$(curl -fsSL https://raw.githubusercontent.com/Homebrew/install/master/install)"Once the Homebrew installation completes, you must inform Python of where it may find packages installed via Homebrew. So you don’t have to perform this procedure every time you wish to use a Homebrew package, we shall edit your shell configuration: type nano ~/.bashrc (or the name of your shell dotfile) in your terminal window. Use the arrow keys to navigate to the bottom of the file, then on a new line, add:
export PYTHONPATH=`brew --prefix`/lib/python3.7/site-packages:$PYTHONPATHSave the file and close Nano, then restart your terminal emulator. Once you have completed the macOS installation steps or if you are running a Linux or BSD distribution, you may proceed. Before running the Crazyflie client, we need to install a few prerequisite software packages. In a terminal window, run the command below that corresponds to your system: each command should be typed on one line only, even if it is split into multiple lines below.
- macOS:
brew install python3 pyqt5 git sdl sdl2 sdl_image sdl_mixer sdl_ttf libusb portmidi - Debian/Ubuntu:
sudo apt-get install python3 python3-pip python3-pyqt5 python3-pyqt5.qtsvg git - openSUSE:
sudo zypper in python3 python3-pip python3-devel python3-qt5 git
Now that we have installed all of the dependencies required to get the Crazyflie client running, we may install the client itself. In your terminal window, navigate to the directory in which you’d like to install the client using cd, then run the following command to clone the latest version from Bitcraze’s GitHub:
git clone https://github.com/bitcraze/crazyflie-clients-python.git
Now, navigate into the directory we just downloaded with cd crazyflie-clients-python. If you perform a directory listing, you should see something that looks like the following:

Next, we shall install the Python dependencies necessary to run the client. In the client directory, run sudo pip3 install -e . to install all dependencies required by the client, in addition to the Python library cflib that we shall use later to write our own code for the Crazyflie. Once this command completes, the client is installed and may be run by typing bin/cfclient in your terminal window. If you are running macOS, you may continue to the next step.
However, if you are running a Linux distribution, you must run a few more commands to allow your non-privileged user account to communicate via the Crazyradio dongle. In your terminal, run the command sudo groupadd plugdev to add a new group for USB communication to your system. Next, you need to determine the username for your account: type whoami in your terminal to output your system username. Now that you know who you are, run the following command: sudo usermod -a -G plugdev [uname], replacing [uname] with your username. Finally, we need to create a udev rules file to grant access to the Crazyradio to the group we just created; create a file /etc/udev/rules.d/99-crazyradio.rules as superuser, and paste the following therein:
SUBSYSTEM=="usb", ATTRS{idVendor}=="1915", ATTRS{idProduct}=="7777", MODE="0664", GROUP="plugdev"Save this file, then reboot your machine. You may now proceed to the next step.
Crazyflie configuration
Now that we have installed all of the requisite software, we may configure the Crazyflie itself. Note that for all of the following steps, it is mandatory that only one Crazyflie be turned on at a time to prevent accidentally running a procedure twice on the same device. Plug in your Crazyradio dongle, then run the Crazyflie client; after a short delay, you should see the main window:
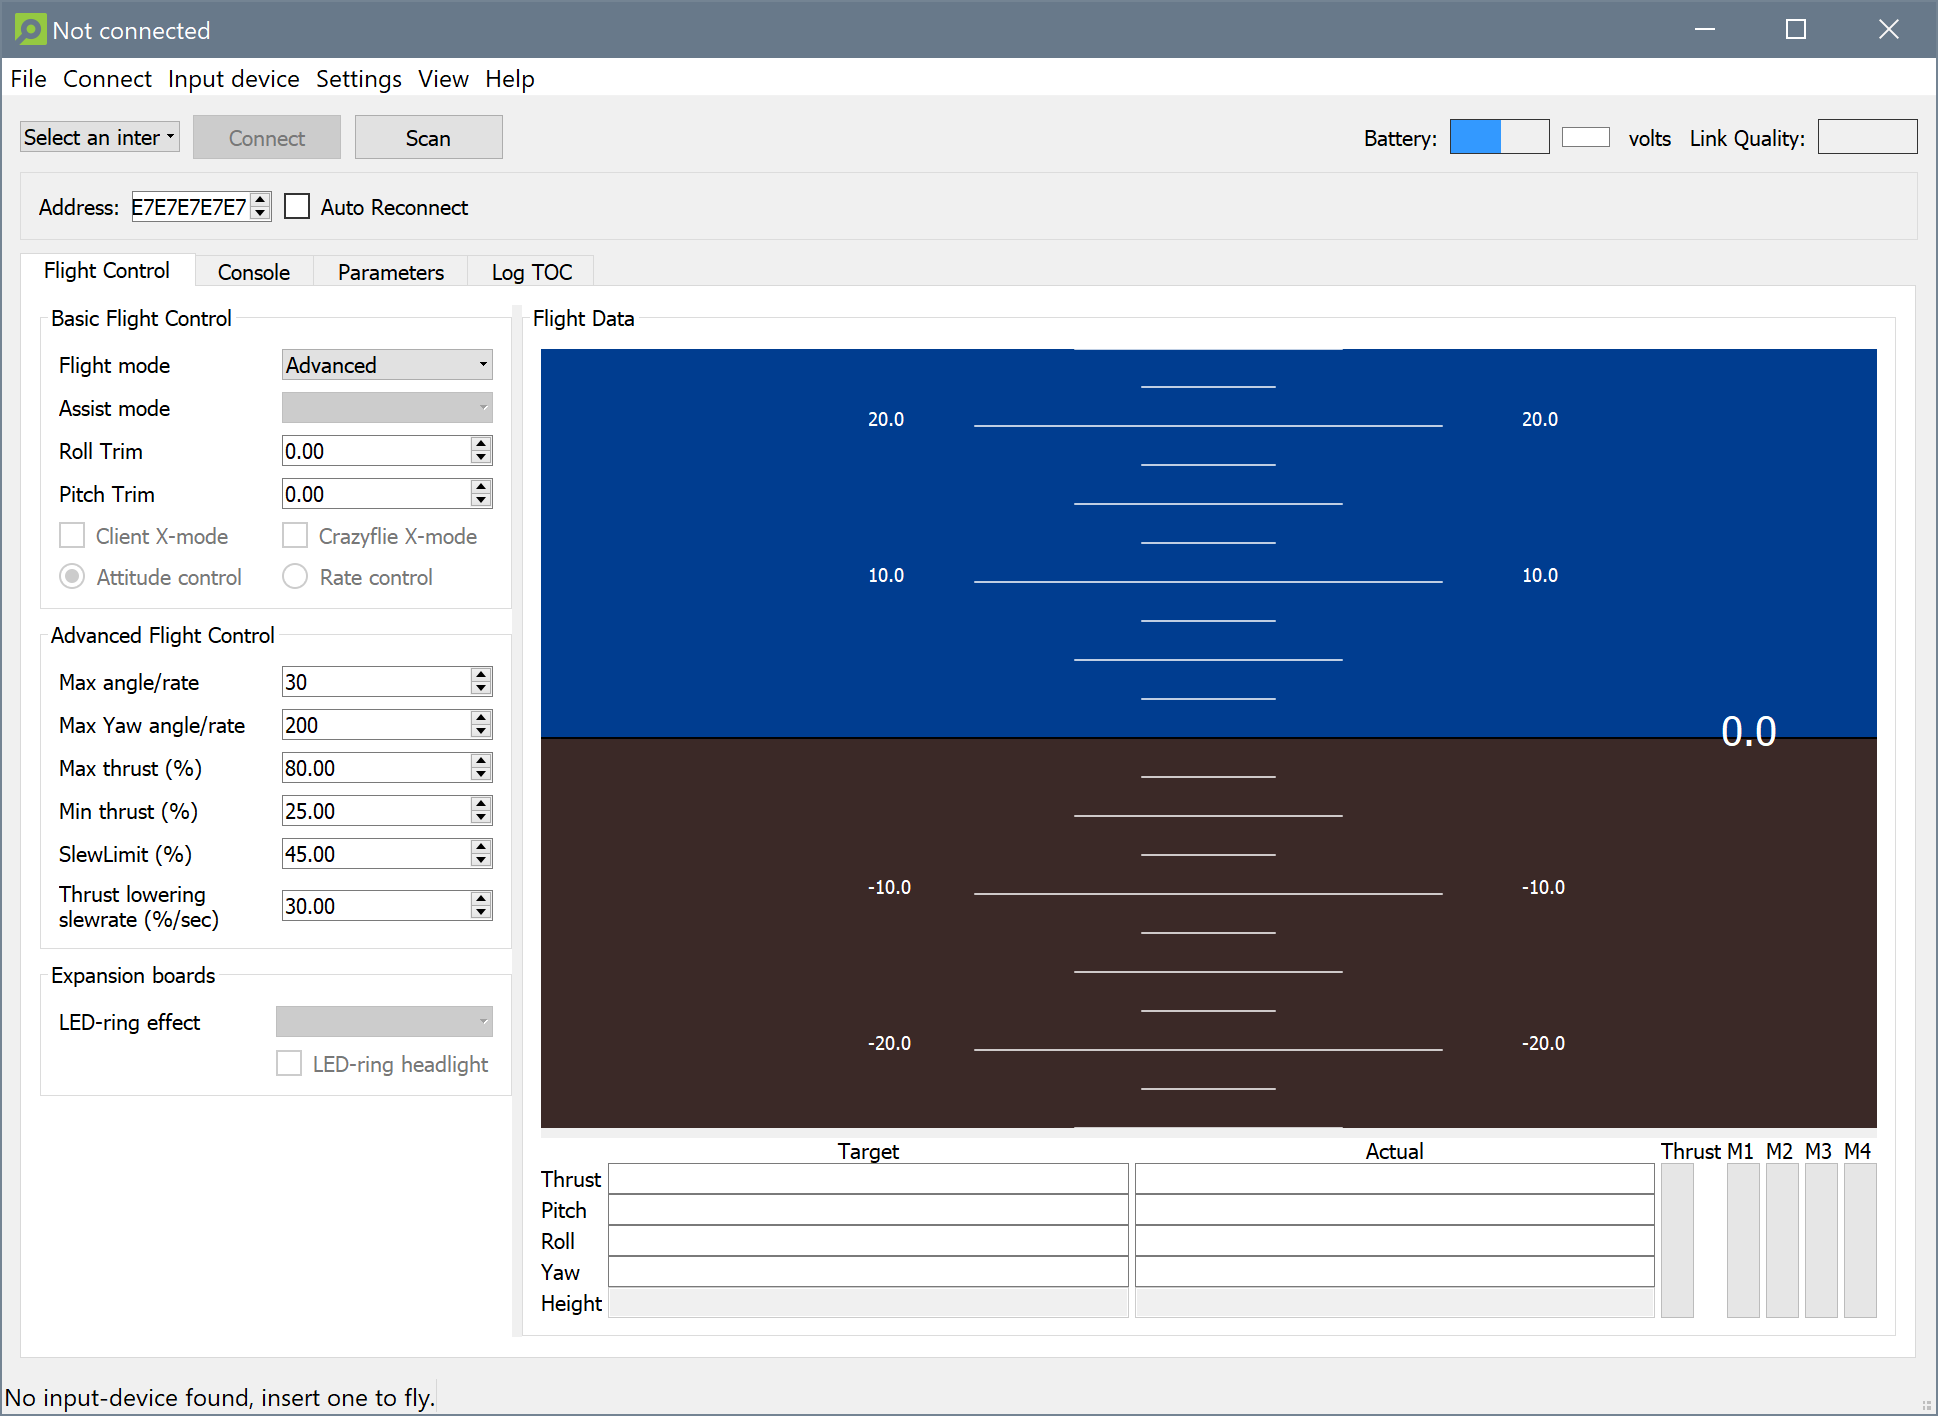
If the client successfully launches, you may proceed. Otherwise, double-check the work you did in the previous section and ensure that you did not mistype anything. If all of your commands were correct and the client still does not launch, reboot your machine and try again.
Don’t cross the streams: Determining the Crazyflie address
In order to communicate with the Crazyradio, each Crazyflie is assigned an address within the local frequency. Before you can do anything else with your quad, you need to determine to what address it is assigned. By default, all Crazyflies come pre-programmed on address 0xE7E7E7E7E7; however, if your unit has been used before, its address may have been changed by the previous pilot. Turn on your quad, then try to connect to it by clicking the “Scan” button at the top of the client window: if options other than Select an interface appear in the dropdown menu next to the “Connect” button, then that is your device’s address. If no other options appear, use the arrow buttons next to the address field until you see more, clicking “Scan” and checking the dropdown after each change. Once you have determined a valid address, select the bottommost option in the dropdown, then click “Connect”. If LED M4 begins flashing green, you have a successful connection with the unit; write down the address you have determined somewhere you may easily access it, then click “Disconnect”.
Get with the programme: Updating firmware
To ensure that you can use all the latest features of the Crazyflie, we shall update your device’s firmware. Download the latest firmware release from Bitcraze’s GitHub, and make note of its location. Turn off your Crazyflie via the power button on Leg 1, then restart it into the bootloader by holding the power button for 3 seconds, or until the blue LED M2 begins flashing slowly. Release the power button, then set your quad aside for now.
In the Crazyflie client, ensure that the address is set correctly for your quad, then click the menu option . The bootloader service dialog should appear.
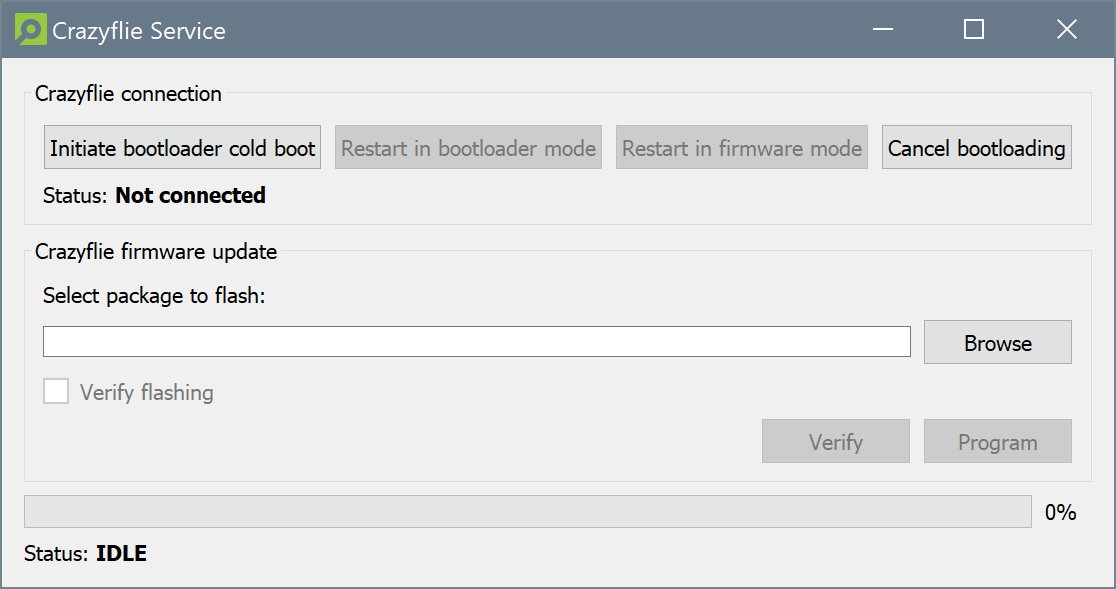
In the bootloader dialog, click the leftmost button “Initiate bootloader cold boot”. Once LED M4 on your quad begins flashing green, the cold boot has completed and you may proceed. Click the “Browse” button under Crazyflie firmware update and select the .zip file you downloaded from GitHub. Click the “Program” button, then wait for programming to complete.
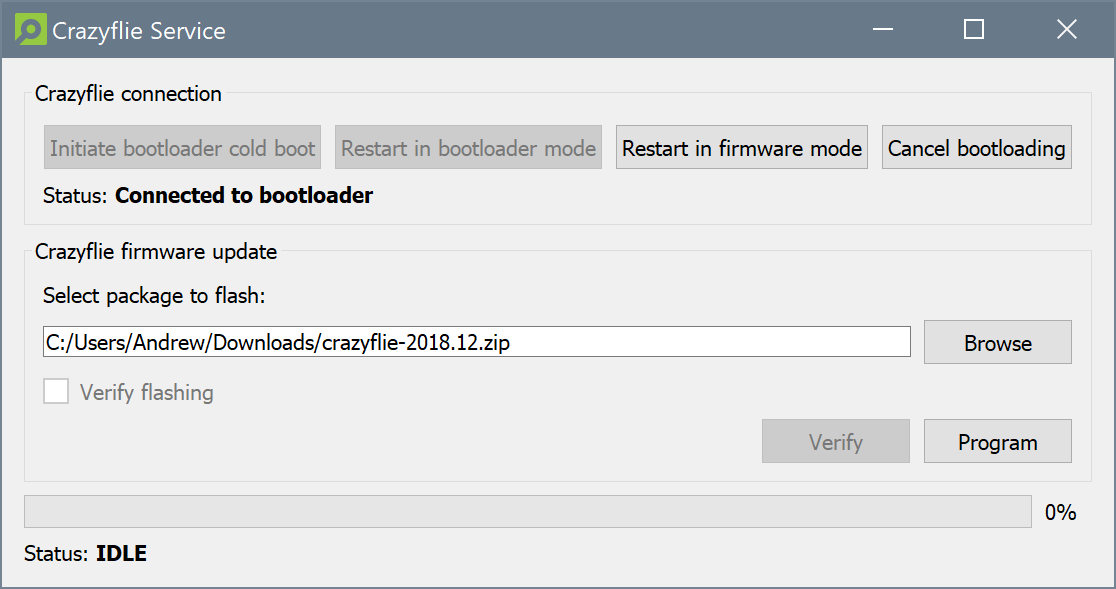
Once the bootloader service dialog reports that programming was successful, click “Restart in firmware mode”. Your Crazyflie should boot normally, performing the regular rotor self-check.
Avoiding collisions: Setting the Crazyflie address
While it is somewhat reasonable to only have one Crazyflie turned on at a time during setup, it is necessary to remedy any potential address collisions before beginning to fly or develop for the quads. Thus, if your unit is set to the default address or you do not like the address to which it is set, you must change its address. Select the current address in the Crazyflie client, then click the menu option . Once your quad has established a connexion, select the menu option .
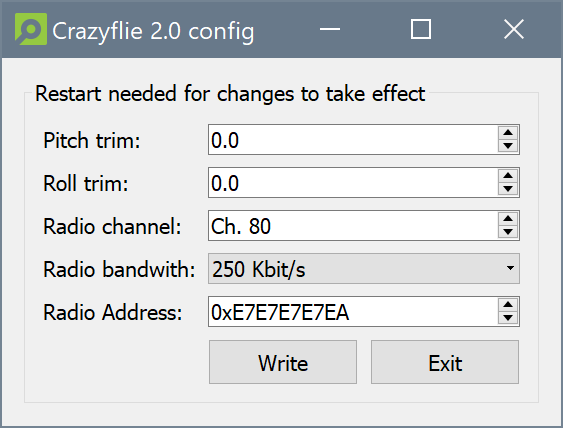
In the dialog that appears, set the address to one that is not in use by any other quad in the vicinity, then click “Write”. Once the address has been set, close the configuration dialog and restart your Crazyflie. Configure the client to use the new address, then try to connect to your quad. If LED M4 begins flashing green upon connexion, the new address has been set successfully.
Flying the Crazyflie
Now that the control software is installed and the Crazyflie is configured, you may begin to fly your quad! Plug in a controller and restart the client; once it launches, you should be able to take control and take off. Select the option that corresponds to your controller in the menu , then increase thrust to get your quad airborne.
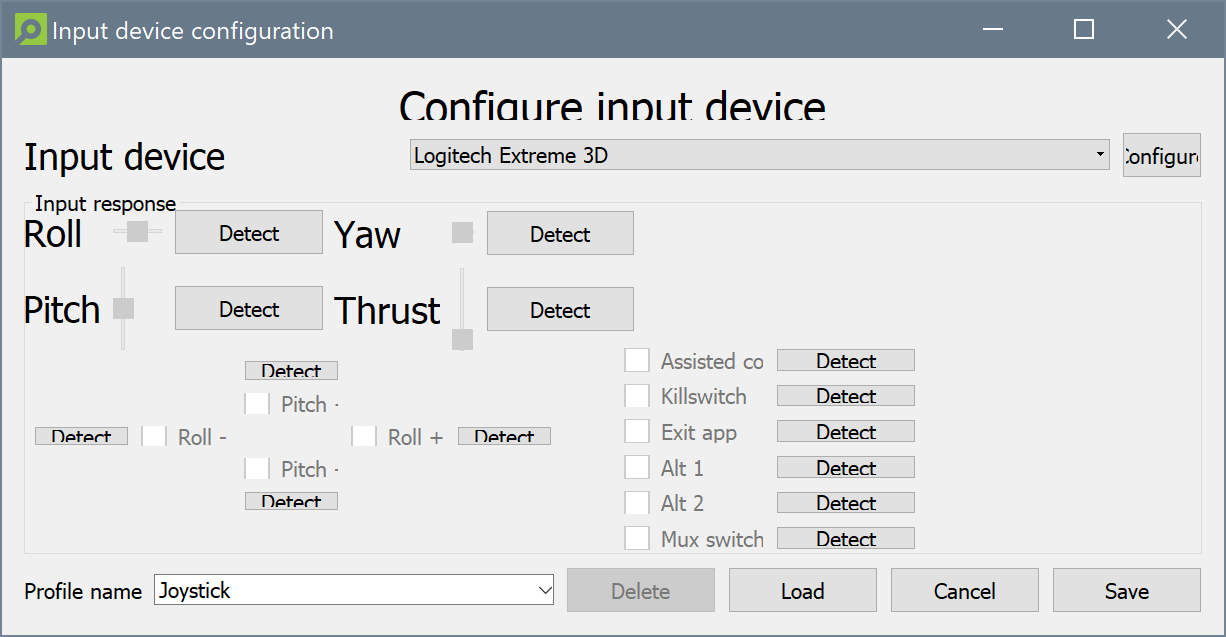
If you find the default input mapping cumbersome, you may use the dialog under the menu option . Select your controller in the dropdown menu at the top of the dialog, then click “Configure”. Select the input profile you would like to customise in the Profile name dropdown, then click “Load”. Once you have finished your customisations and calibrations, click “Save” and close the dialog. Your changes should be applied immediately.